
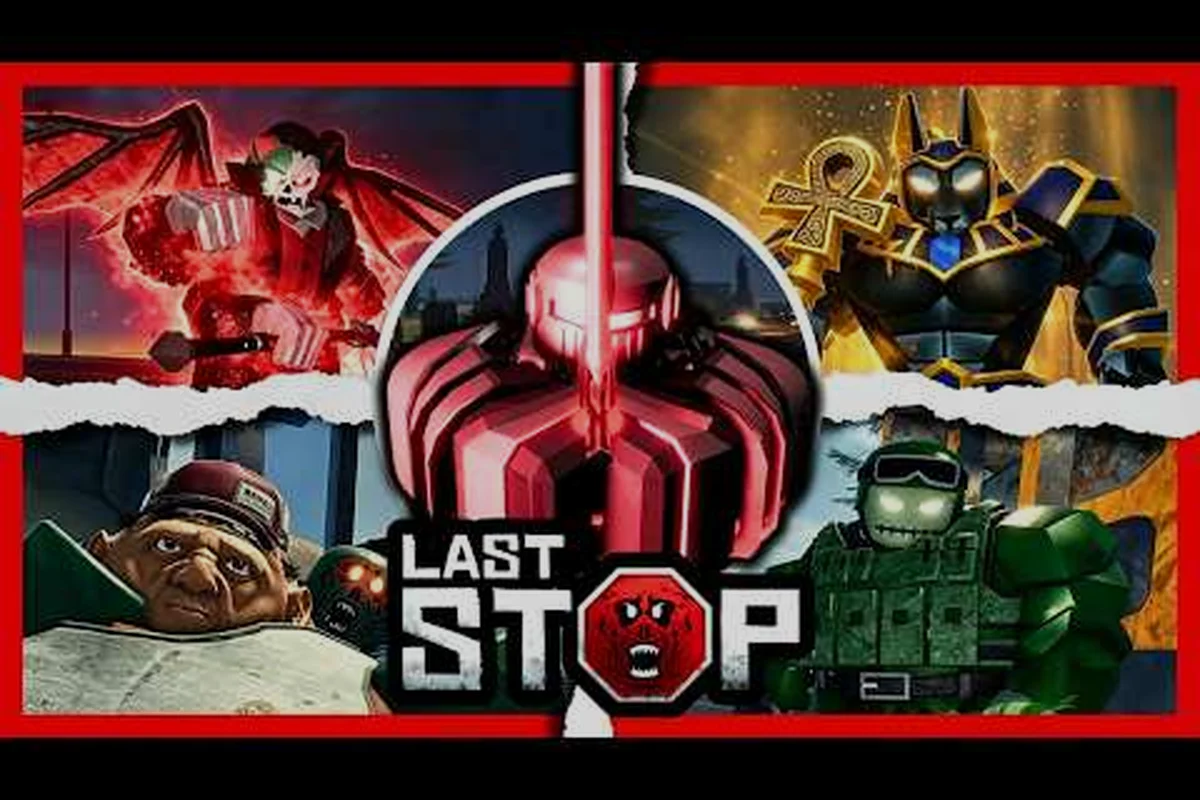
Every road in Last Stop eventually funnels into a named encounter, and the difference between reaching the finale and getting wiped at a checkpoint almost always comes down to how well you prepared for the fight waiting at the end of that road. Learning every Last Stop Roblox boss — from the Alien Mothership to Fred — is the single fastest way to shorten a run, because each one punishes a specific mistake and rewards a specific build. This guide walks through every encounter, the mechanic that defines it, and the counter that actually works in a 25-player server.
The Last Stop Boss Roster at a Glance
Last Stop is a Roblox zombie-survival game by The Hidden Route that launched in August 2026 and has been updated on a rapid beta cadence through September 2026, with the official Last Stop page on Roblox listing the current boss lineup. According to community testing and verified creator footage, the full list of Last Stop all bosses is Alien Mothership, Military, Vampire Lord, Anubis, and Fred as the finale, with Hollowjack tucked behind a secret ending route.
| Boss | Encounter Type | Core Mechanic | Where It Gates Progress |
|---|---|---|---|
| Alien Mothership | Nightmare-mode aerial | Shield phases, ground hazards | Nightmare difficulty only |
| Military | Ranged kiting fight | Spawn-kill its gunners | Mid-run checkpoint |
| Vampire Lord | Melee attrition | Lifesteal windows | Late-game road |
| Anubis | Statues-first puzzle | Break statues to drop its shield | Pre-finale road |
| Fred | Final melee + projectile | Phase transitions, arena shrinks | Last Stop finale |
| Hollowjack | Boxed encounter | Tied to secret ending | Alternate finale path |
The five road bosses share a common design philosophy: each one trains you to handle a different system before the finale piles them on. The Alien Mothership is the only true outlier, because it sits behind Nightmare mode and isn't part of the standard progression curve. If you want a quick visual breakdown of how the lineup compares, the Last Stop Nightmare Mode — All Bosses video by HorrorJackStar walks through every encounter back-to-back and is a solid reference for movement patterns.
Bosses are not the only way the road gates progress — biomes change enemy density, loot quality, and the zombie variants you'll be juggling between fights. The Last Stop biome list is worth a read if you want to understand which road you're walking when a boss drops in.
How to Beat the Military Boss
The Military fight is the first real ranged kiting encounter most players meet, and it is also the encounter that wipes the most unprepared groups. The boss itself doesn't melee — it spawns gunners at the edges of the arena who lock onto the nearest player and fire in bursts, and the boss stays near cover at the center while its health bar ticks down from wave clears.
The counter is straightforward but punishes greed: pushing the Military boss's health bar past the next wave threshold without first clearing the active gunner spawn is the single most common cause of wipes, because every gunner still firing multiplies the squad's incoming burst damage and burns through medkits faster than Nightmare-tier groups can sustain — smart groups deliberately hold the boss at near-full HP during Wave 2 so the third gunner wave spawns in a controlled state, then collapse all six gunners with melee baits before committing the final burn.
-
Pull the boss into the open field behind its starting cover so the gunners have to path a long way around before they can shoot
-
Clear gunners before you commit to the boss's health bar, because every gunner left standing multiplies incoming damage
-
Spread the squad across the arena so gunners don't stack onto a single target
| Phase | What Happens | Counter |
|---|---|---|
| Wave 1 | 2 gunners, low health | Both players split left/right and clear in long |
| Wave 2 | 4 gunners, mid health | Use melee weapons to bait fire then dash in |
| Wave 3 (boss) | 6 gunners + boss | One player baits, two on boss, one peeling gunners |
The Military fight is a positioning test, not a damage test. Community reports from Nightmare beta runs suggest that groups who lose this fight usually cluster in a single corner — the gunners collapse onto that corner and the squad burns through medkits before the boss drops. Spread, kite, and the encounter folds in under a minute.
If you're still learning the basics of bus-building and inventory before a checkpoint like this hits, the Last Stop beginner guide covers the looting loop that lets you actually afford the weapons you want to bring into the fight.
How to Beat the Vampire Lord
The Vampire Lord is the attrition check of the mid-game road. Unlike the Military encounter, this boss walks directly at the squad and hits hard in melee, but every successful attack heals it for a chunk of its missing health. The fight is a damage check disguised as a tank check, and the squads that win are the ones who learn the lifesteal windows and break them.
The boss has three observable attack patterns — Lunge, Cleave, and Summon — and each one is gated by a distinct telegraph that the squad can read in roughly an instant, which is the entire margin between a clean punish and taking a lifesteal tick back to full threat. Learning to differentiate the rear-leg crouch (Lunge) from the dual-arm raise (Cleave) from the channel glow (Summon) is what separates squads that clear the Vampire Lord in under two minutes from those that reset after the second add wave.
-
Lunge — a short-range dash that ends in a fast wind-up animation; dodge backward and punish the recovery
-
Cleave — a 180-degree frontal swing that covers the boss's forward arc; sidestep right and land two hits on the back
-
Summon — the boss stops moving, channels for a short window, and spawns two lesser vampires on its flanks; this is the only safe time to do sustained damage
| Pattern | Telegraph | Safe Window | Recommended Punish |
|---|---|---|---|
| Lunge | Low crouch, rear leg loads | Fast, after the dash lands | 2-3 melee hits on the back |
| Cleave | Both arms raise, slight lean | Instant, after swing finishes | Sidestep + backstab |
| Summon | Channel glow, no movement | A short channel duration | Burst with guns/melee |
The big mistake squads make is treating the Summon phase as a free damage window and ignoring the lesser vampires. The adds will pin a lone player if no one peels, and the boss will start the next round of patterns at full health. Assign one player to handle the adds and the rest of the squad burns the boss during the channel — this is the cleanest, fastest clear strategy and the one that the community consistently lands on.
Because the Vampire Lord fight rewards kiting discipline, the same stamina and weapon-stagger fundamentals from the Military fight apply. The Last Stop core survival guide has a good rundown of which weapons keep their stagger value into the late game.
How to Beat Anubis and the Statues Mechanic
Anubis is the puzzle boss of the late game. The boss spawns behind a permanent damage shield that absorbs everything you throw at it, and the only way to drop the shield is to destroy the four Anubis statues placed at the cardinal points of the arena. The statues respawn roughly regularly, so the fight becomes a race to keep them all down at once while the boss itself is chipping away at the squad.
The mechanic has three layers, and understanding how they stack is what separates a clean Anubis clear from a 4-cycle wipe: the statue destruction layer handles shield uptime, the aggro-swapping layer controls who actually takes boss pressure between cycles, and the shield-window layer is where your squad converts all that setup into real boss damage. The table below maps each statue to a specific role based on its distance from Anubis, because aggro swaps follow the last statue broken — not the closest player.
-
Each destroyed statue removes a quarter of the shield and exposes a brief damage window on the boss
-
When all four statues are down at the same time, the shield collapses entirely and the boss takes full damage for a brief window
-
Boss aggro swaps to whoever destroyed the most recent statue, so statue-breaking order matters for survivability
| Statue | Distance From Boss | Recommended Breaker | Why |
|---|---|---|---|
| North | Far | Ranged player with a high-damage gun | Long path for boss aggro swap |
| East | Mid | Melee with high mobility | Quick retreat after breaking |
| South | Mid | Second melee, ideally the tank | Stagger the boss during the break |
| West | Far | Second ranged or ammo carrier | Symmetric aggro spread |
The squads that beat Anubis fastest assign statues by distance, not by role. Two ranged players take the far statues, two melee take the mid ones, and the squad collapses onto the boss during the long full-shield window. Once the shield comes back, the cycle repeats. The full clear usually takes 3-4 shield cycles, and the boss's health pool is tuned so that missing even one shield window extends the fight by more than about a minute — which usually means more zombie waves on top of the encounter.
If you want a frame-by-frame look at the statue timing, the All Endings (True & Bad) & Final Boss Fight video shows the full cycle and the squad assignment that the creator used to clear the encounter on stream.
The Last Stop Final Boss: Fred
Fred is the Last Stop final boss and the encounter that gates every ending. He is a multi-phase melee + projectile hybrid that forces the squad to track both ground patterns and ranged threats at the same time. The arena shrinks as the fight progresses — the edges become visible damage zones — so the squad is constantly being pushed inward, which makes spacing just as important as damage.
Fred has three observable phases, each triggered by an HP threshold — above average and low — and each one permanently stacks a new pattern on top of the previous instead of replacing old moves, which is why squads that breeze through Phase 1 often get crushed in Phase 2 when the projectile volleys silently double and a ground-slam AoE gets layered onto the existing melee combo.
-
Phase 1 (maximum to above-average HP) — Fred uses single-target melee combos and an occasional projectile volley; the arena is at full size
-
Phase 2 (above average to very low HP) — projectile volleys double, melee combos add a ground-slam AoE; the outer ring starts ticking
-
Phase 3 (low to critical HP) — the inner arena shrinks, ground hazards become constant, and Fred enrages with a permanent damage buff
| Phase | HP Range | Arena State | Key Pattern to Watch | Counter |
|---|---|---|---|---|
| 1 | Full to above-average | Full | Single-target combos | Bait, punish recovery, spread for volleys |
| 2 | Above-average to low | Outer ring ticks | Projectile volleys + AoE | Stay mid-range, dodge the AoE tell |
| 3 | Low to empty | Inner arena only | Permanent enrage buff | Burn medkits, commit to DPS race |
The critical mistake in Phase 3 is trying to play it safe. The arena is small, Fred hits hard, and the squad's medkit pool is finite — playing defensive actually costs you the fight because the arena keeps shrinking until there's no safe ground left. The right call is to commit to the burn, accept trades, and finish the fight before the arena collapses entirely.
For a complete Last Stop final boss how to beat strategy, the key is to enter the fight with at least two medkits per player, full ammo on the squad's best ranged weapon, and a melee weapon equipped for the projectile-dodging windows. Squads that prep for the Military, Vampire Lord, and Anubis fights with leftover resources are the squads that clear Fred on the first pull.
How the Six Bosses Stack Up
The full tier rankings live in the Last Stop boss tier list breakdown, but here is a quick snapshot of how the community currently ranks the encounters by difficulty and clear time: a 4-player squad pushing the Military encounter on Easy is the first real damage check, while Fred's phase transition at roughly the two-minute mark is what pushes groups out of the several minutes clear window and into true S-tier territory. Players chasing the Hollowjack secret ending should also expect wildly inconsistent timers since that fight's phase count scales with squad damage rather than a fixed timer.
| Boss | Difficulty | Avg Clear (4-player squad) | Tier |
|---|---|---|---|
| Military | Easy | About a minute | B |
| Vampire Lord | Medium | A minute or more | A |
| Anubis | Medium-Hard | A minute or more | A |
| Fred | Hard | Several minutes | S |
| Alien Mothership | Nightmare-only | Very long | S+ |
| Hollowjack | Secret ending | varies | S+ |
These rankings shift slightly with each beta patch, but the general shape holds: Fred and the secret-ending fights are the ceiling, Anubis and the Vampire Lord are the late-game gatekeepers, and the Military fight is the first real test of squad discipline.
Frequently Asked Questions
What are all the bosses in Last Stop Roblox?
The standard roster, per the official Roblox page and verified community testing, is Alien Mothership, Military, Vampire Lord, Anubis, and Fred, with Hollowjack tied to the secret ending. The Alien Mothership is gated behind Nightmare mode, so most players only encounter the four road bosses plus Fred on a normal run.
How do you beat the Last Stop Military boss?
Spread the squad across the arena, kite the boss into the open field behind its starting cover, and clear the gunners in waves before committing damage to the boss itself. The fight is a positioning test, not a damage test — clustered squads get collapsed on by gunners and burn through medkits before the boss drops.
How do you break Anubis's shield in Last Stop?
Destroy the four statues at the cardinal points of the arena to drop the shield in quarters, and try to keep all four statues down at the same time for a long full-damage window. Assign statues by distance — ranged players take the far pair, melee take the mid pair — and the shield collapses in 3-4 cycles.
What is the hardest boss in Last Stop Roblox?
Fred is the hardest standard boss because of the shrinking arena in Phase 3 and the combined melee + projectile pressure. The Alien Mothership and Hollowjack are technically harder, but both are gated behind Nightmare mode and the secret ending respectively, so most players hit Fred first as the real skill ceiling.
Can you solo all the Last Stop bosses?
Yes, every road boss is soloable with full upgraded gear and a stocked medkit pool, but clear times roughly double compared to a 4-player squad. The Military and Vampire Lord fights solo cleanly, while Anubis and Fred are noticeably harder because the squad分担 of statue-breaking and arena pressure disappears.