
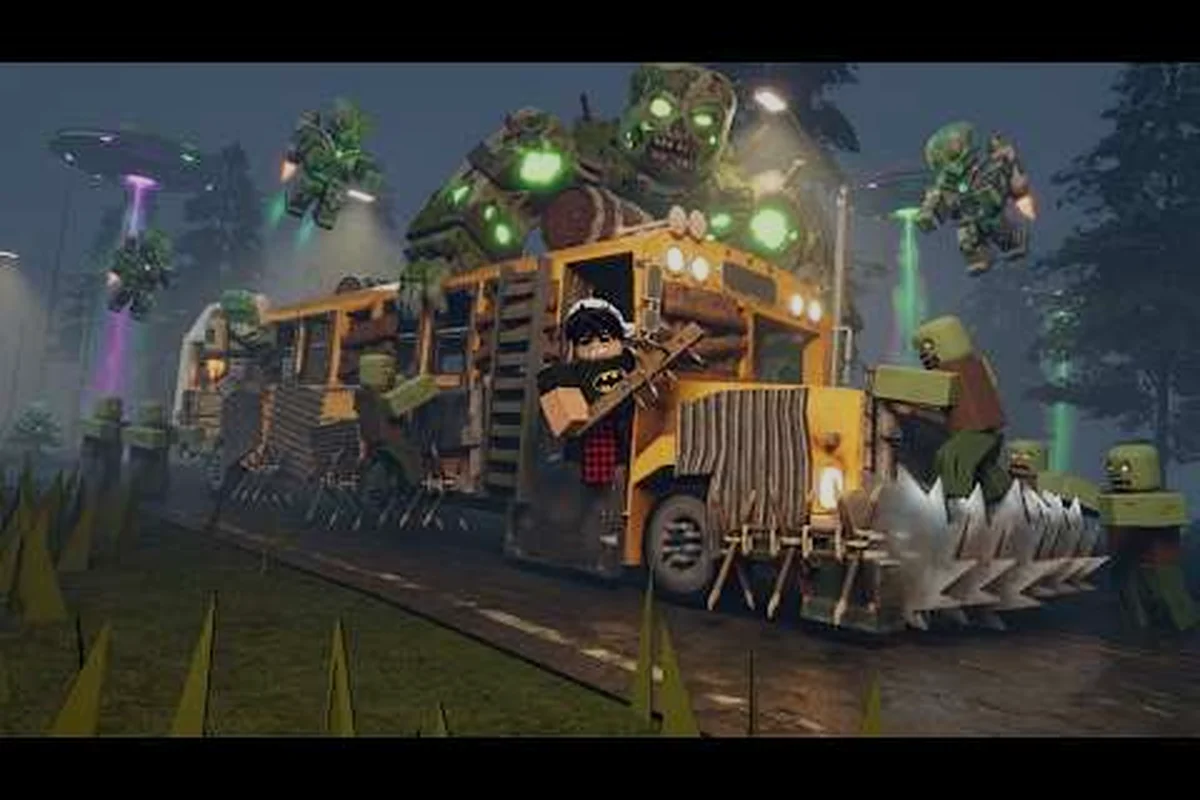
Last Stop overhead storage covers every container you bolt onto the bus frame — the roof rack above the cab, the wall-mounted single chests, and the double chests that merge two units into one. This guide breaks down each system, the slot counts and craft costs behind them, the Z-pattern placement that keeps a crew moving during waves, and the layouts that stop vendor-trip loops from eating your fuel.
What Overhead Storage Adds to the Bus
Last Stop overhead storage is the umbrella term for every container and roof rack you can bolt onto your bus once the starter chassis starts overflowing with scavenged loot. It covers three connected systems: the roof storage rack that sits above the cab, the wall-mounted bus chests that line the interior, and the double chests that combine two single units into one larger container. The reason it matters is simple — the entire Last Stop economy is built on how much you can haul between stops, and the default inventory space on a fresh bus runs dry within the first two scavenges.
Community testing reported across multiple creator videos shows that bus overhead roof storage and double chests are how you expand the bus's inventory to near-infinite capacity. A baseline bus rolls out of the starting town holding roughly enough room for one full cabin sweep plus a partial dumpster haul. By the time you bolt a roof rack, two wall chests, and one double chest onto the same chassis, the same crew can clear three stops in a row without returning to a vendor to offload. That kind of throughput is the difference between scraping together enough cash for a metal wall upgrade before Stop 4 and rolling into the Oil Rig biome with a full rocket launcher loadout.
Overhead storage also indirectly solves two problems that aren't obvious until you've played a few runs. The first is the constant vendor-trip loop: without expanded slots, you spend fuel driving back to town to sell, which leaves less fuel for the actual road. The second is the sleeping bag problem — the bag itself eats a backpack slot that could otherwise hold ammo or a med kit, so the more you push storage onto the bus frame, the more personal inventory you free up for survival gear. Both of these pressures show up in the creator footage from the Build to Survive ZOMBIE BUS for 100,000 Miles series by Atlantic Blox, where the bus gradually sprouts roof racks and wall chests as the run progresses.
Last Stop Bus Chests: Wall-Mounted Single Containers
Last Stop bus chests are the single-container workhorses that snap into the interior walls of your bus frame. Each one adds a fixed block of inventory slots that the bus can access while parked or while idling at a stop. They are the first storage expansion most players unlock, because the craft cost is low and the slot returns are immediate. According to community data shared in build walkthroughs, a single bus chest roughly doubles what you can hold between vendor trips, and three of them lined up along the same wall are enough to absorb an entire bus stop's worth of loot.
The placement logic matters more than players expect. Chests slotted near the door of the bus are easier to access during a wave because you can dump a haul in two clicks without climbing over sleeping bags or fuel chests. Chests slotted near the back wall are safer during acid rain or a UFO pass because they sit behind the metal wall upgrade once you install it. Most experienced crews reported in creator content layer their chests in a Z-pattern — one near the door, one mid-bus, one near the back — so a single player can rotate between them while driving.
The material tier of the chest itself does not change in the current patch: every bus chest uses the same wood-and-metal skin and offers the same slot count. What changes is what you store inside it. The community-accepted convention is to dedicate one chest to ammo and rockets, a second to medical supplies and bandages, and a third to loot earmarked for the vendor. This separation is what allows a four-person crew to keep their hands free for weapons during a wave instead of fumbling through a single shared backpack.
| Chest Slot | Recommended Contents | Why It Works |
|---|---|---|
| Near the door | Loot earmarked for vendor | Fast dump access during scavenge runs |
| Mid-bus | Ammo, rockets, ranged mags | Keeps the shooter loadout within reach |
| Back wall | Medical supplies, bandages | Sits behind upgraded walls for safety |
| Optional fourth | Scrap and craft materials | Free up backpack for weapons during waves |
Last Stop Double Chests: Doubling Capacity in One Slot
Last stop double chests are two single chests fused into one larger container that occupies the same wall footprint but roughly doubles the storage block. They are the mid-game storage unlock and the single biggest capacity jump available before you start stacking roof racks. According to build footage from Zonko's bus upgrade series, the double chest is what flips a bus from "scavenge one stop, sell, repeat" into "scavenge three stops, sell once," which is the throughput threshold most crews chase before attempting the Oil Rig.
The craft cost for a double chest is steeper than two separate singles because the recipe requires a binding kit plus an extra metal sheet on top of the base chest cost. The trade-off is that you free up one wall slot for another upgrade — typically a wall trap, a fuel chest, or a sleeping bag mount. In a standard mid-game bus layout, players reported running one double chest for loot earmarked for the next vendor run and a second single chest dedicated to ammo. This split lets the double chest act as a deep reservoir while the single chest handles the high-turnover items.
Double chests also interact well with roof storage. A bus running one double chest plus a roof rack can effectively treat the rack as overflow — anything that doesn't fit into the chest gets tossed onto the rack and sold at the next town. This is the pattern the Cocajola full guide to Last Stop describes as the "loop the loot" pattern, where the bus never returns to a vendor with an empty chest, because the roof rack absorbs everything the chest can't hold. The practical effect is fewer wasted scavenge runs and a smoother fuel economy on long legs.
| Storage Tier | Slot Estimate | Best Use Case | Unlock Stage |
|---|---|---|---|
| Starter bus | ~1 cabin sweep | Early tutorial zone | Default |
| + 1 single chest | ~2 cabin sweeps | First scavenge loop | Stop 1 town |
| + 2 single chests | ~3 stops of loot | Mid-early run | Stop 2 to Stop 3 |
| + 1 double chest | ~4-5 stops of loot | Pre-Oil Rig prep | Stop 3 to Stop 4 |
| + roof rack | Near-infinite overflow | Late game and final push | Stop 4 onward |
Last Stop Bus Sleeping Bag: How It Ties Into Storage
The last stop bus sleeping bag is a craftable item that lets you skip a dangerous night segment by sleeping through it on the bus, rather than fighting the wave. It costs a backpack slot the moment you craft it, which is why most players delay crafting one until they've expanded their overhead storage — otherwise the bag eats the room you need for a medkit or a spare mag. The DustPlays alien class and bus overview walks through the same logic: a roof rack plus wall chests free up enough personal inventory that the sleeping bag becomes a viable craft instead of a luxury.
The sleeping bag mechanic itself is straightforward. When the night timer starts and the wave indicator turns red, you can interact with the bag to fast-forward through the night. The bus does not move during this window, so you want to park it in a defensible position — usually against a wall or near a checkpoint — before you trigger the sleep. Waking up on the other side skips the zombie wave entirely but also skips any loot that wave would have dropped, so the bag is a trade, not a free win.
Storage planning for the sleeping bag follows a simple rule: build it into the bus wall, not your personal inventory, once you have a chest layout that supports it. Mounted bags behave like wall chests in that they free up backpack space, but they only count as one wall slot. The optimal placement is on the back wall next to the medical chest, so the bag and the medkit are in the same interaction zone when you wake up and need to heal from the previous day's damage.
Last Stop Craft Sleeping Bag: Recipe, Cost, and Timing
To last stop craft sleeping bag, you need a crafting bench at any bus stop town, plus a small bundle of scavenged materials: typically cloth scraps, some rope, and a piece of foam or padding. Exact costs vary by server and patch, but community reports put the cloth scrap count at around 4-6 units and the rope at 2-3 units. The craft is cheap relative to a wall chest or a metal wall upgrade, which is why most players craft the bag early and then regret eating the backpack slot.
The smarter sequence reported across creator content is to delay the craft until after you've installed at least one bus chest and ideally one roof rack. At that point your personal inventory has expanded enough that the sleeping bag slot is no longer painful. Some crews reported crafting two bags and mounting one on the bus while keeping the second in a chest as a backup, in case the mounted bag is destroyed by a UFO or a boss wave.
Timing the craft matters because the sleeping bag is most useful on the long night legs — Stop 3 to Stop 4 and the final push to the Last Stop itself. Crafting it during Stop 1 is wasted inventory, because the early nights are short and the loot drops from those waves are valuable. Crafting it during Stop 3 is the sweet spot, because the night that follows is long, the loot is less critical, and your bus storage is already expanded enough to absorb the bag.
Roof Storage and the Path to Near-Infinite Capacity
The roof rack is the top-of-bus upgrade that converts unused vertical space into a storage platform. It sits above the cab and holds loose loot, overflow items, and anything that doesn't need to be in a chest. Capacity is hard to pin to an exact slot count because the rack holds loose items rather than discrete slots, but creator footage and community testing both describe it as the final piece that pushes the bus from "expanded" to "near-infinite." Once the rack is installed, the limiting factor on a haul is no longer storage but time — you run out of scavenge time before you run out of rack space.
The roof rack also pairs well with the alien bus and its customization options, because the alien chassis has reinforced roof rails that support heavier loads without bending the bus frame. Standard buses can still mount a rack, but the alien bus turns the rack into a primary storage tier rather than an overflow buffer. The same source notes that alien bus roof storage is a tier above the standard bus roof, which is why crews chasing the final push to the Last Stop often swap chassis mid-run.
The interaction between roof rack and double chest is the practical backbone of late-game storage. The double chest holds the high-value, high-turnover items — vendor loot, ammo, medical — while the roof rack absorbs the long tail of mid-value items that you don't want to vendor but can't fit in a chest. This split is also why inventory management for Last Stop recommends dedicating chest slots by category rather than by value: the rack is the value-sorting layer, the chests are the category-sorting layer.
| Storage Layer | Holds | Sort Key | Access Speed |
|---|---|---|---|
| Personal inventory | Weapons, active meds | Use frequency | Fastest |
| Wall chests (single) | Ammo, vendor loot | Category | Fast |
| Double chest | Deep reserves, craft mats | Category | Medium |
| Roof rack | Overflow, mid-value loot | Value | Slow |
| Fuel chest | Fuel only | Resource type | Medium |
Practical Layouts: Building a Storage-Forward Bus
The standard storage-forward bus layout reported in community guides runs one double chest on the back wall, two single chests mid-bus, one fuel chest near the gas tank, one sleeping bag mount next to the medical chest, and a roof rack above the cab. This configuration leaves room for two wall traps on the side walls, which is the minimum defensive stack most crews consider viable past Stop 3. The layout assumes a four-person crew; solo runs typically drop one single chest and add a second wall trap instead.
The economy-focused layout drops the second single chest and adds a second double chest, because the priority shifts from "carry everything" to "carry everything worth selling." This is the layout that most closely matches the tier list recommendations for bus builds, which rate storage density as a top-three bus stat for any run longer than two stops. The trade-off is reduced ammo capacity, so this layout pairs best with classes that don't burn through mags — a low-fire-rate melee role rather than a rifle role.
The survival-focused layout keeps the standard chest count but adds the sleeping bag earlier, around Stop 2, and routes the roof rack toward medical overflow rather than vendor loot. This is the layout solo players and small crews tend to prefer, because skipping waves is more valuable than maximizing vendor throughput when the run is short on hands. The sleeping bag mount takes one wall slot, so this layout drops one single chest to compensate.
Storage Layout Mistakes to Avoid
The most common storage mistake reported by players is over-investing in chests before the walls are upgraded. A bus full of chests behind fiberglass walls loses every chest the moment a Brute zombie or a bandit rocket punch breaks through. The community-accepted upgrade order is metal walls first, then chests, then roof rack, then sleeping bag — because the chests only matter if they survive the wave that tests them. The bus fuel and storage guide makes the same point from the fuel-chest angle: a fuel chest is useless if the wall next to it is shredded.
The second mistake is not labeling chest contents. In a four-person crew, "the chest with the rockets" becomes a scavenger hunt the first time a stranger joins the bus. Most crews solve this by dedicating chest positions to categories — left chest for ammo, right chest for vendor loot, back double chest for medical — and enforcing the convention with a quick verbal rundown at the start of each run.
The third mistake is crafting the sleeping bag before the rack is installed. The bag eats a backpack slot the moment it enters personal inventory, and if your bus has no roof rack to absorb the overflow from the chest you just freed up, the net storage gain from the chest is zero. The simple fix is to install the roof rack first, then craft the bag, then mount the bag on the wall — at which point the bag returns its backpack slot to you.
| Mistake | Why It Hurts | Fix |
|---|---|---|
| Chests before metal walls | Chests get shredded in waves | Metal walls first, then chests |
| Mixed chest contents | Slows crew during emergencies | Dedicate chests by category |
| Sleeping bag before rack | Bag eats a backpack slot | Install roof rack before crafting bag |
| No fuel chest near tank | Fuel hauls scatter across chests | Place fuel chest adjacent to gas tank |
| Roof rack on fiberglass frame | Rack can detach under load | Upgrade to metal bus before mounting rack |
Putting the Storage Stack Together: A First-Run Plan
For a first run, the recommended sequence is: roll out of the starting town with the default bus, scavenge Stop 1, sell at the vendor, buy one single chest and the metal wall upgrade, install both, scavenge Stop 2, sell, buy a second single chest plus the roof rack, install both, then craft the sleeping bag once the rack is up. By Stop 3, you should have two single chests, a roof rack, and a mounted sleeping bag — which is the storage floor most crews consider viable for the Oil Rig push.
For a second run, the same sequence applies but you can front-load the double chest instead of the second single chest, because you'll know which category deserves the deeper slot. Most players who have run the game at least twice end up prioritizing the double chest for vendor loot, because that's the category that scales fastest as the run gets longer. The update roadmap and new bus content suggests the storage meta will keep shifting, but the chest-plus-rack-plus-bag spine is stable across patches.
For a third run or later, the storage stack expands to the economy-focused layout — two double chests, one single chest, fuel chest, sleeping bag, roof rack — which is roughly the ceiling for what a single bus can carry without chassis swaps. At that point the limiting factor is no longer storage but crew coordination, and the bus is effectively running at full capacity for any leg shorter than the final push to the Last Stop itself.
Frequently Asked Questions
What does Last Stop overhead storage include?
It covers three systems: the roof rack above the cab, wall-mounted bus chests along the interior, and double chests that fuse two singles into one larger container. Together they turn a starter bus's single-cabin-sweep capacity into enough room to clear three or more stops before returning to a vendor.
How many bus chests should I install before the Oil Rig?
Most crews reported in creator content run two single chests plus one double chest by the time they push into the Ocean biome. That stack absorbs a full scavenge run plus the Oil Rig's bonus loot without forcing a vendor trip mid-leg. Adding a roof rack on top turns the rig into a buffer rather than a hard cap.
When should I craft the sleeping bag?
The accepted timing is after the roof rack is installed but before Stop 3, so the bag has a wall to mount on and your personal inventory has enough overflow room to absorb the craft cost. Crafting it during Stop 1 wastes a slot because early nights are short and the loot from those waves is too valuable to skip.
Do double chests take more wall space than two singles?
No, a double chest occupies the same wall footprint as one single chest but roughly doubles the slot count. The trade-off is a steeper craft cost — a binding kit plus an extra metal sheet on top of the base chest recipe — which is why most crews delay the upgrade until after the metal wall is in place.
Can I lose chests if the bus gets destroyed?
Yes, any chest mounted to a wall that breaks during a wave is destroyed along with its contents. This is why the community-accepted upgrade order is metal walls first, chests second — a chest behind a fiberglass wall is a temporary container at best. Roof racks fare slightly better because they sit above the cab, but they can still detach if the frame bends under a boss hit.